- News
Some Tips and Tricks to Using Vidigami, Overlake's New Photo Sharing Site

Since the launch of Vidigami at the start of the school year we have received great feedback from those who have registered. If you have not registered yet for Vidigami, please consider doing so as this is the school's main resource for photo sharing.
Below are some tips to help you get started.
To Find Photos
|
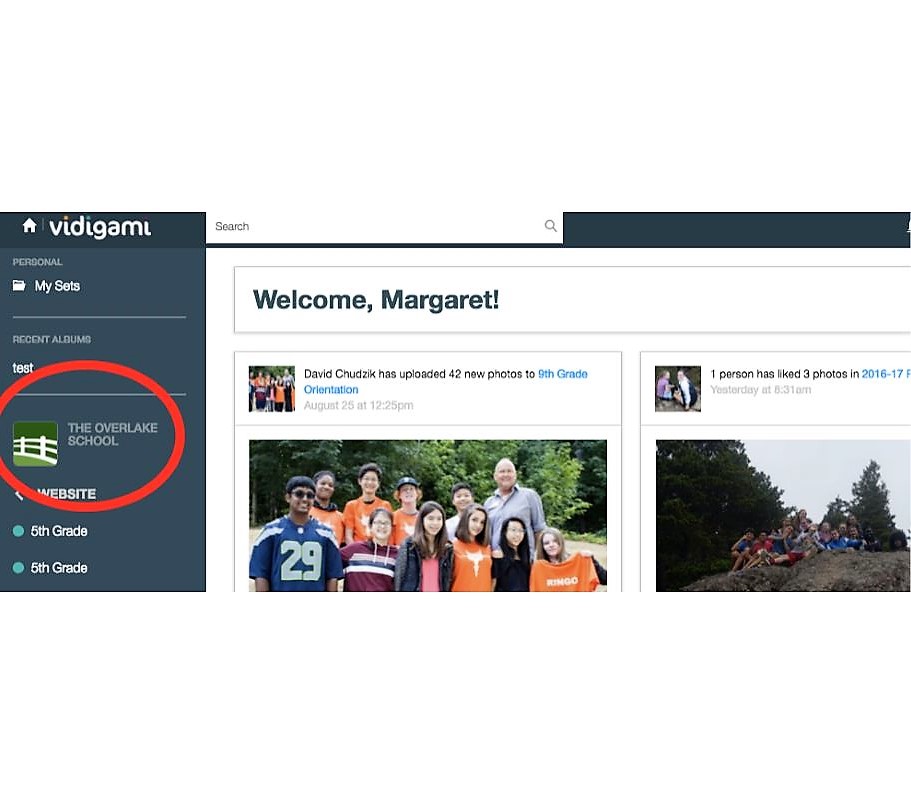
1. Log on using your personal password. 2. Click on "The Overlake School Icon" located on the left-hand side of screen. |
 |
| 3. Under your name, choose the school year you wish to view | 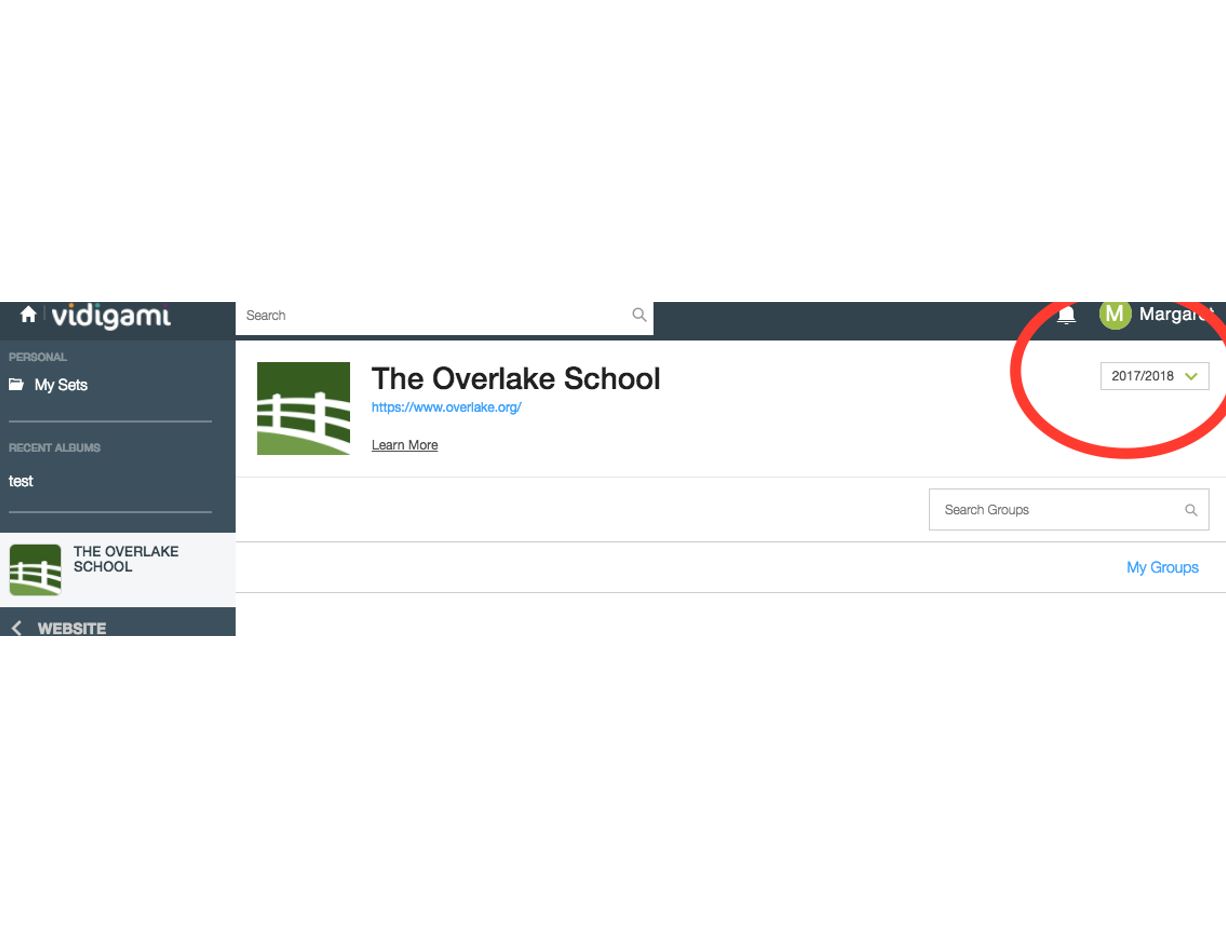 |
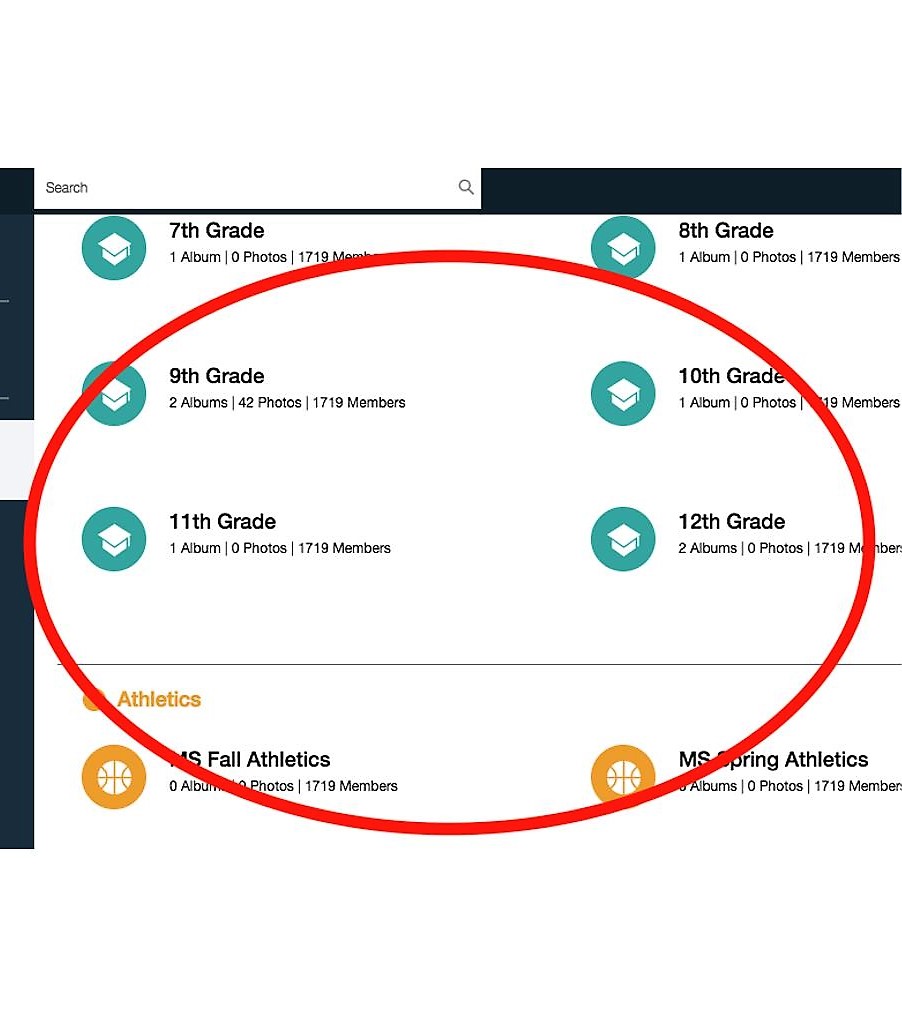
| 4. Choose from the various categories, such as academics, athletics, arts, etc.
5. Choose a particular album from any category. |
 |
To Download a Photo
|
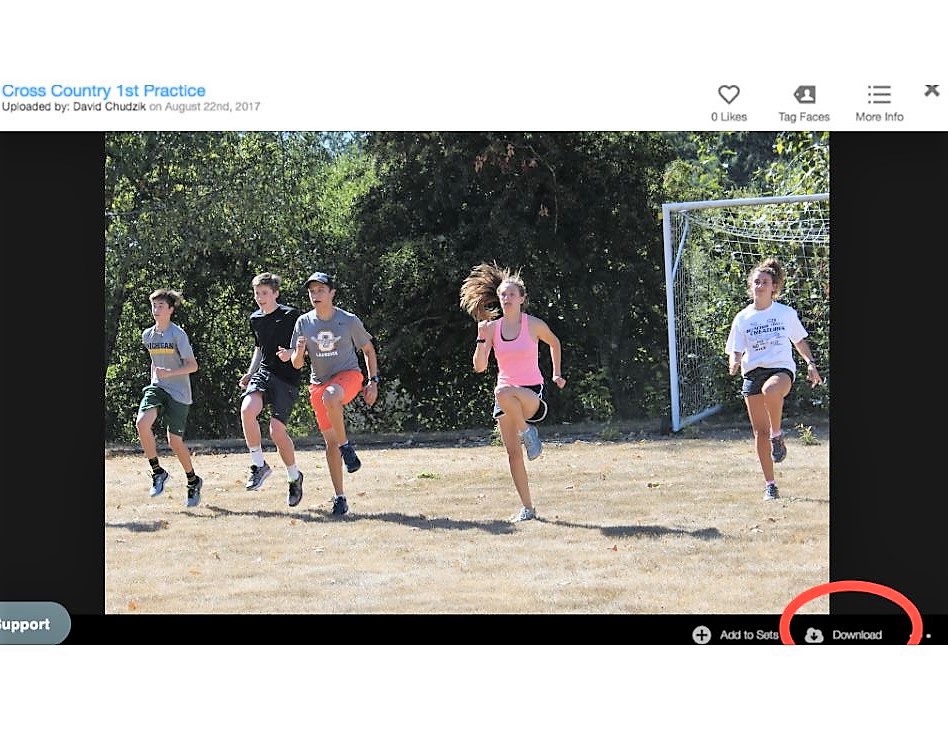
1. Follow the steps above when selecting a photo you wish to download. 2. Click on the photo and then select the “Download” button on the bottom right hand corner of the photo. |
 |
To add photos to your own personal sets
| 1. At the top left-hand side of the site, under the name Vidigami is an area called “My Sets”. | 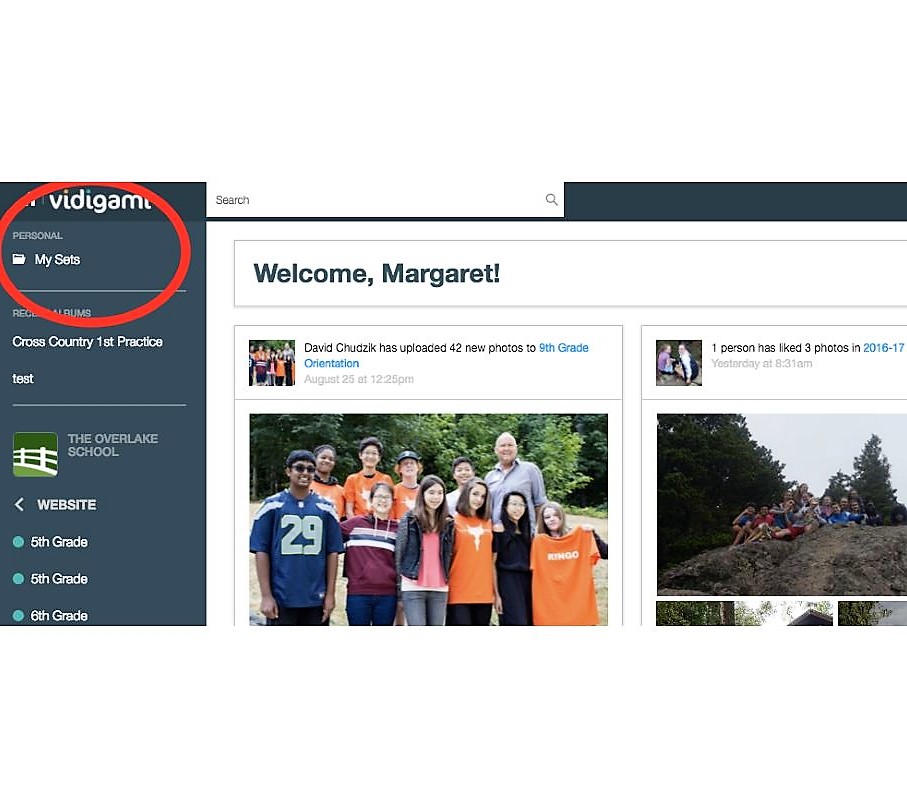 |
| 2. Click on "My Sets" and set up your own personal album by clicking on the green button on the right-hand side called “New Set”. | 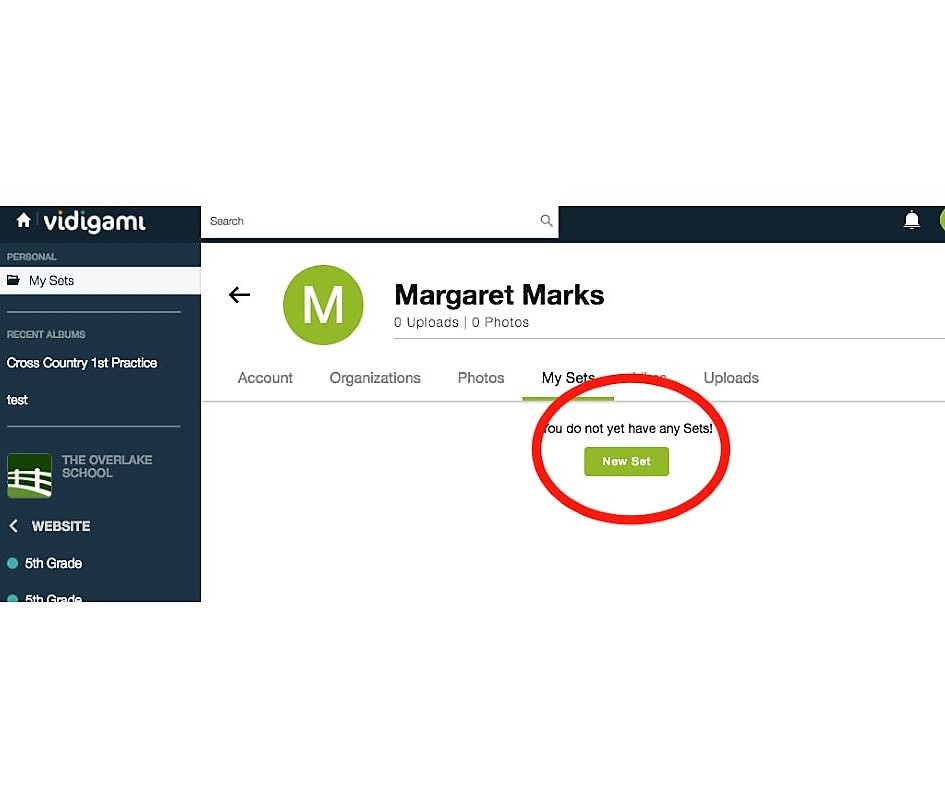 |
|
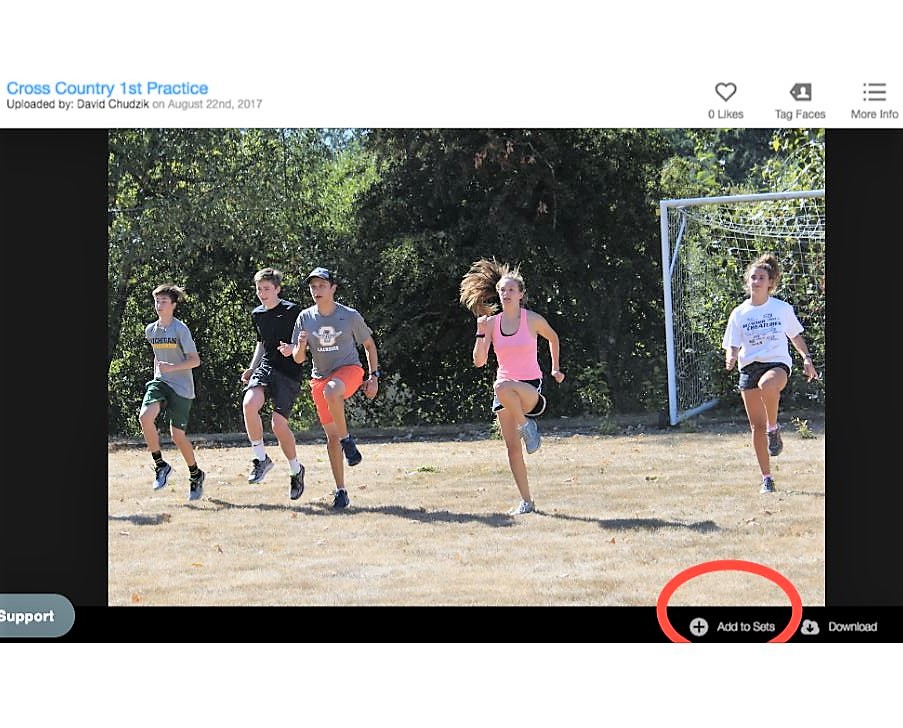
3. Now find the photo, or album you wish to save under your own personal set
|
 |
| 5.If you wish to add an entire photo album to your personal set, click on the button to select all photos in that album. | 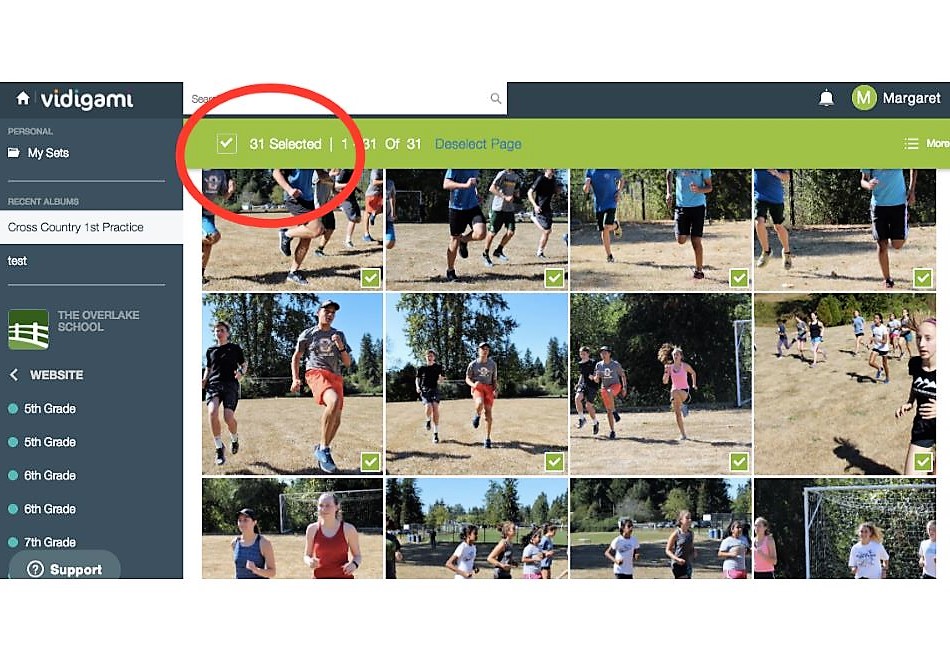 |
| 6. Then click on the "Add to Sets" button on the green bar. | 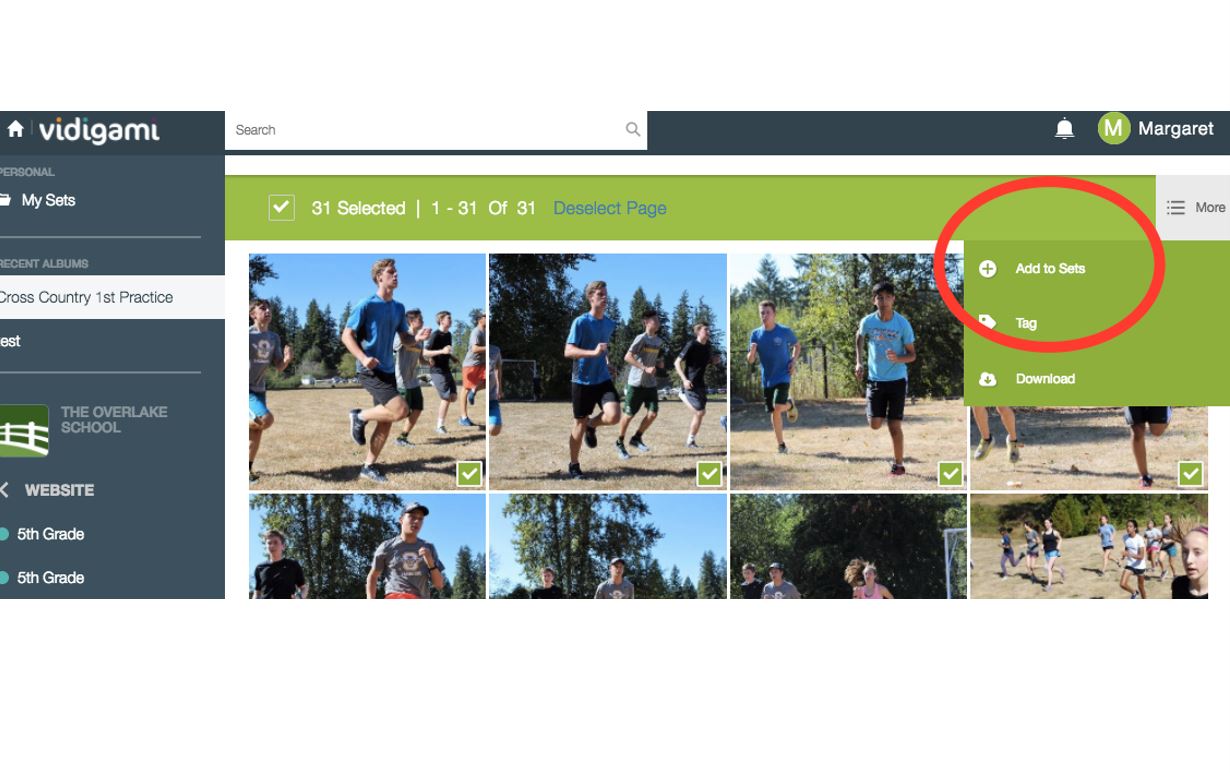 |
To upload a photo
| 1. Select the school year you wish to upload to by clicking on the appropriate school year under your name. | |
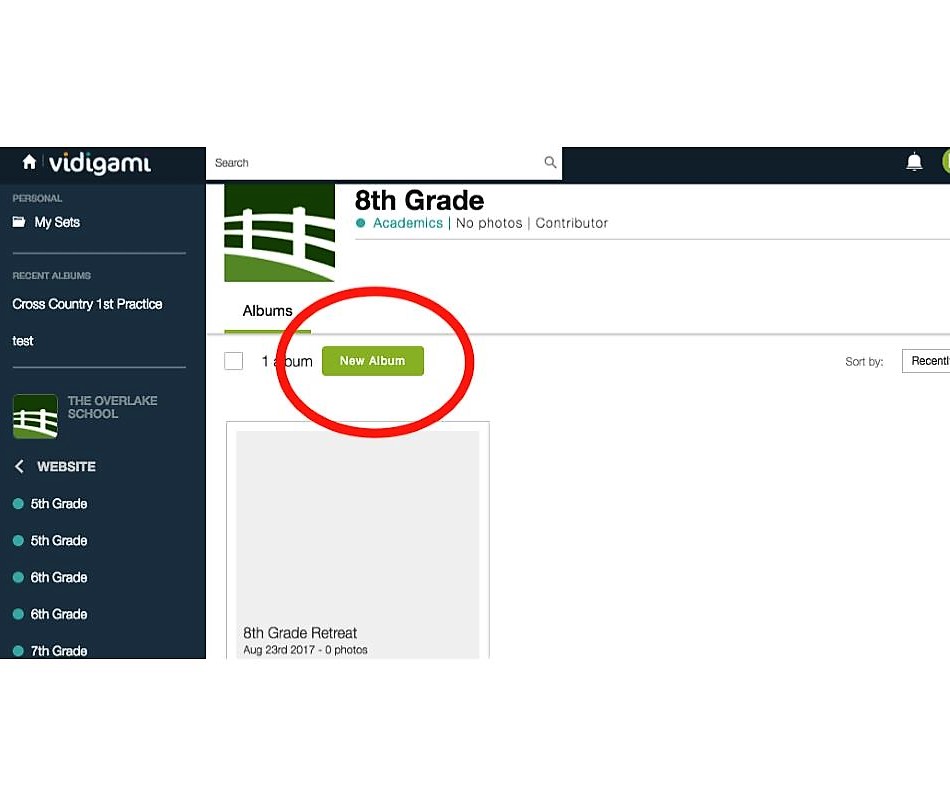
| 2. Select the category you wish to upload to, such as academics, athletics, arts, etc. (please keep in mind some albums may already be created. If so, you can simply add your photos to that album)
3. If an album has not been created for your particular photos, then create a new album by clicking on the green "New Album" button located near the top of the screen. |
 |
| 4. After clicking on "New Album" select a name for the album and click "Proceed". | 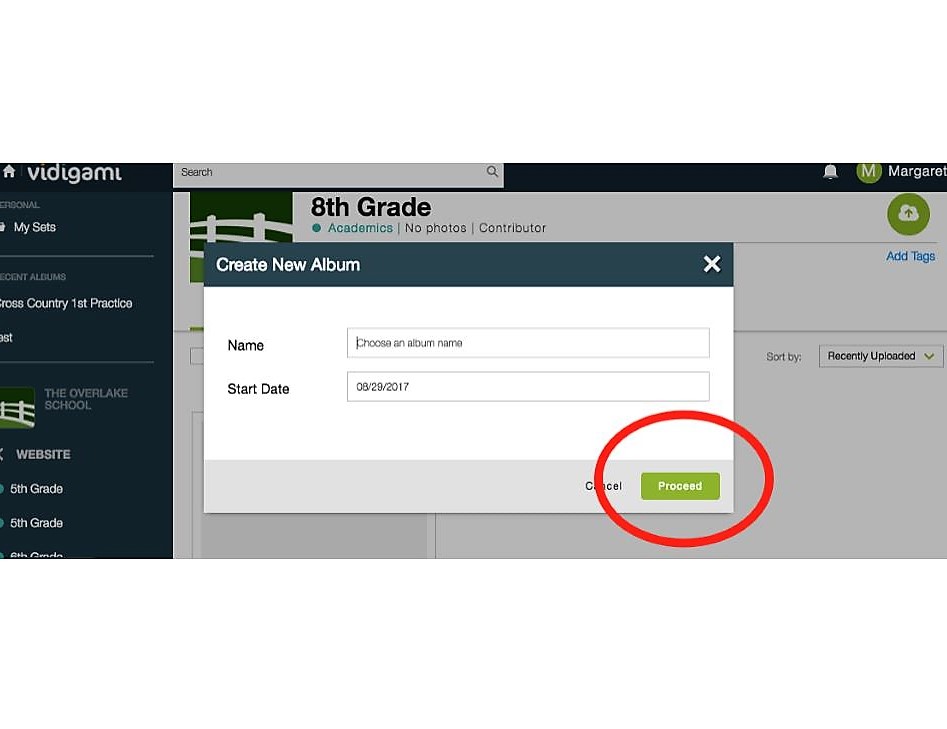 |
|
5. Now you can upload your photos 6. Please keep in mind the following specs when uploading |
|